Manage Your Account - Billing Section
Log in to the EZSCRIPTRx app and select 'Dashboard' from the top menu. From the dropdown, navigate to and click on 'Billing' to access your billing information and settings.

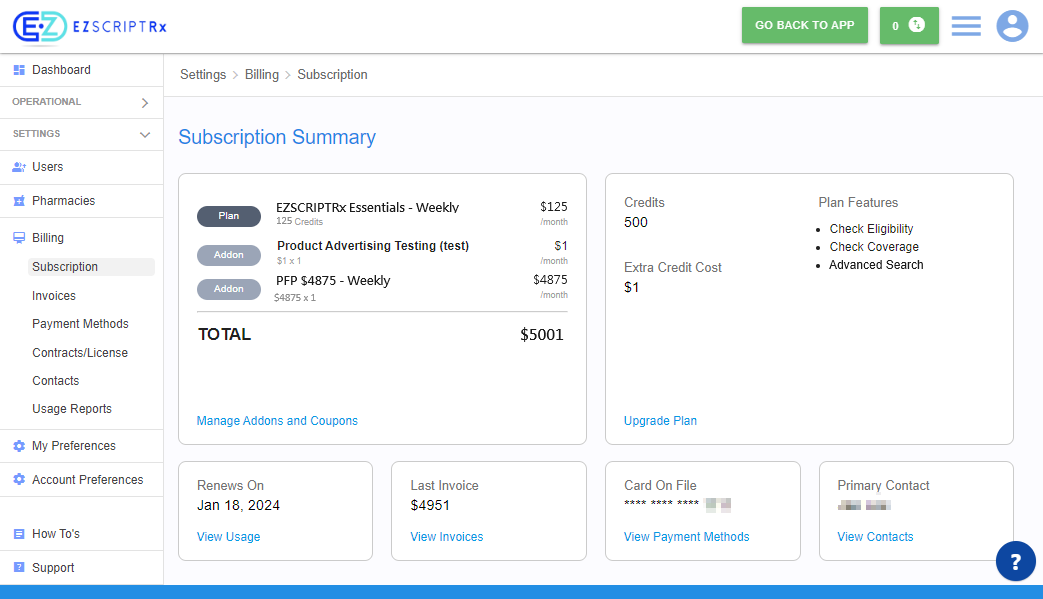
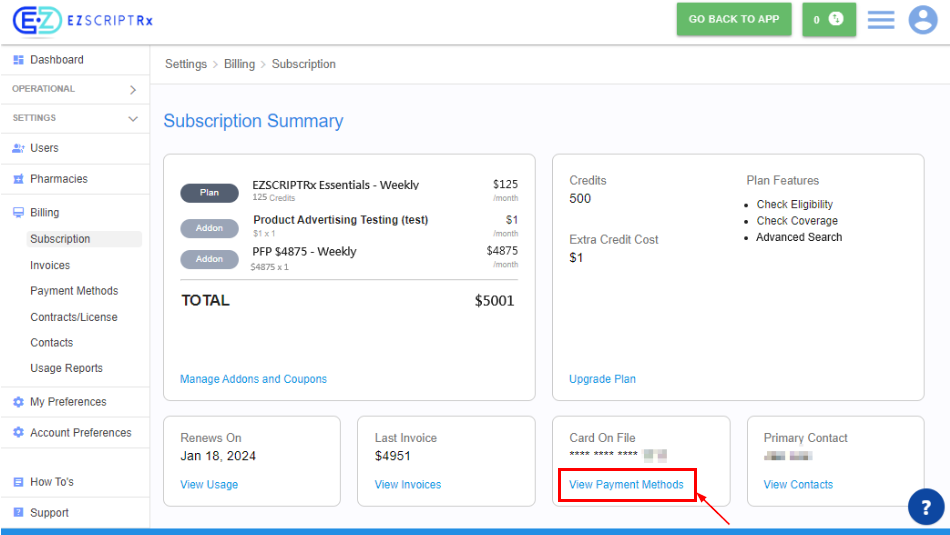
On this screen, you can view your Subscription Summary. It provides an overview of your current plan, available credits, plan features, and recent invoices. Additionally, you can manage your payment methods, usage, and contract details.

Additionally, you'll find recommendations for plan upgrades tailored to enhance your current subscription.
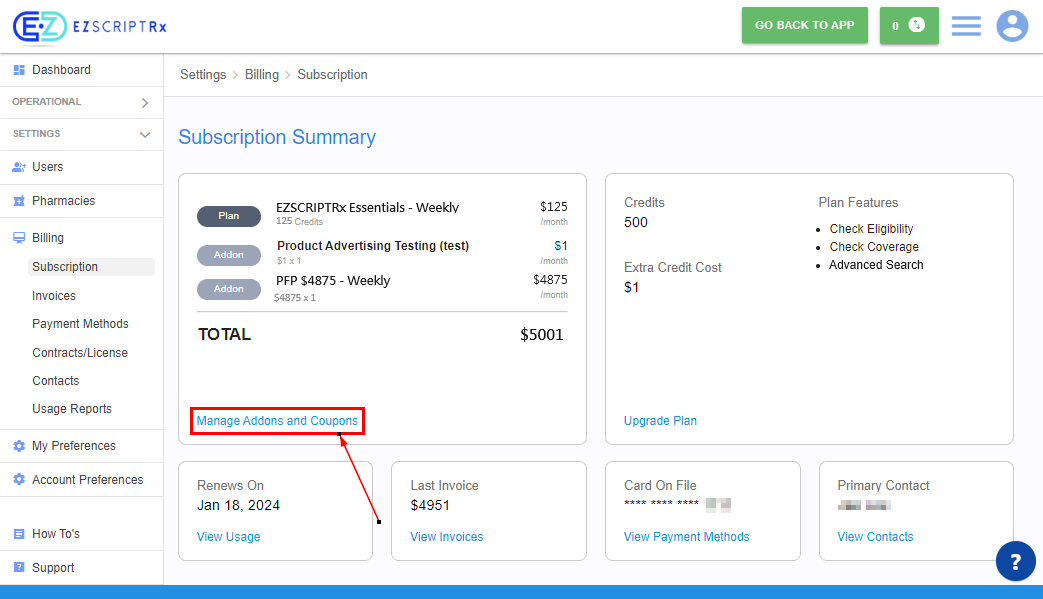
To manage your account enhancements, select 'Manage Addons and Coupons.' A pop-up window will appear, allowing you to customize additional services and apply available coupons to your account.
In this section, you can add new coupons and remove existing ones. Similarly, you have the option to add recommended add-ons or remove current ones from your subscription.
Adding a new Add-on
To add an add-on to your subscription, you have two methods available:
Within your current plan, select 'Manage Add-ons and Coupons' to add new features directly.
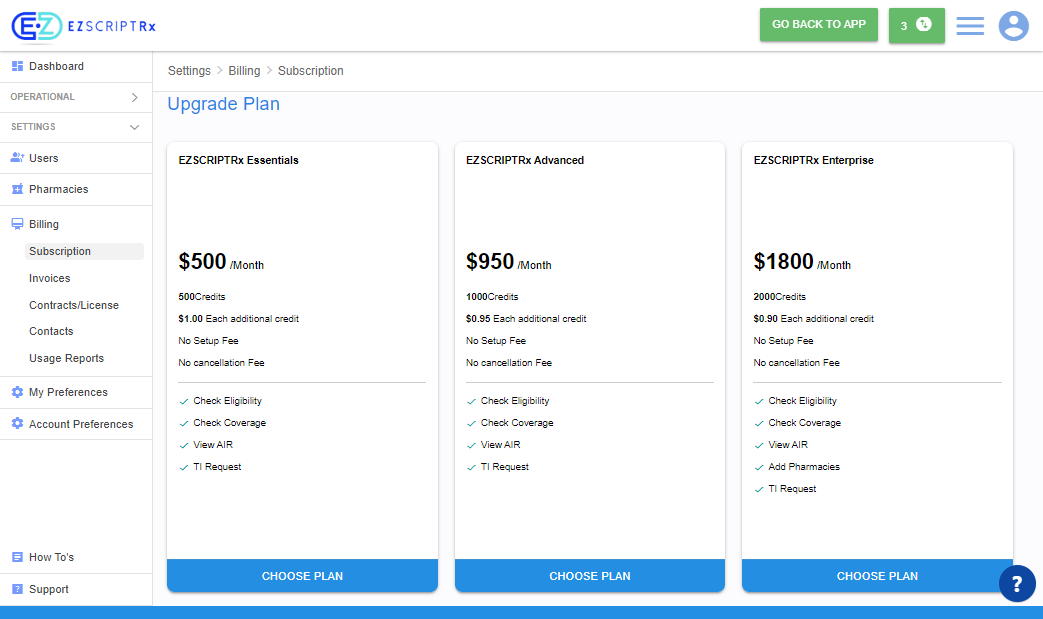
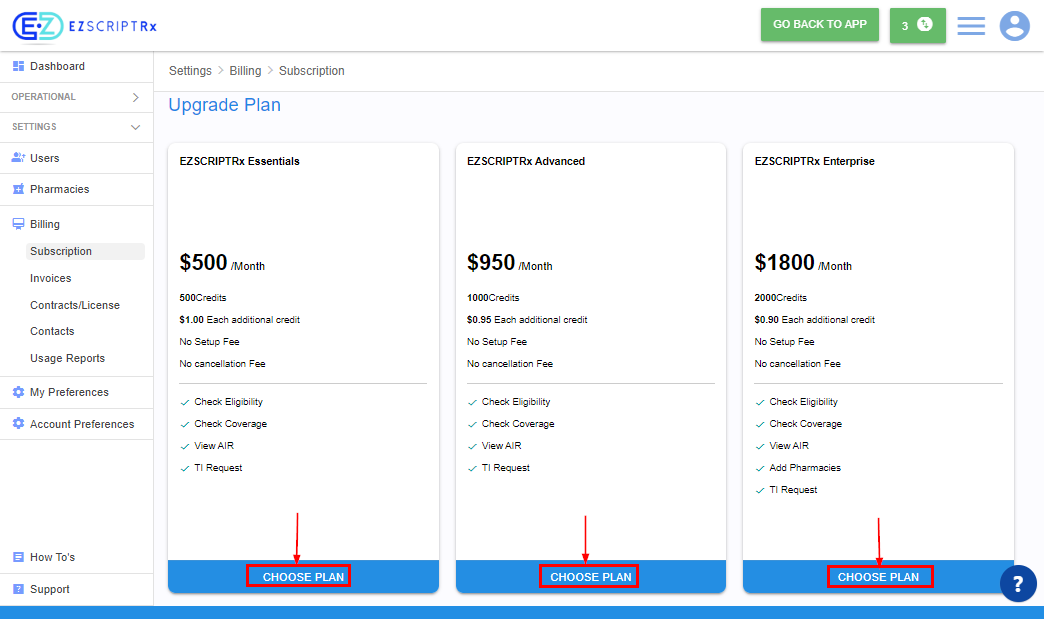
Alternatively, opt to upgrade your entire plan. In the 'Upgrade Plan' section, click 'Choose Plan' next to the desired plan level to include additional features and benefits.
Adding a new add-on to the current plan:
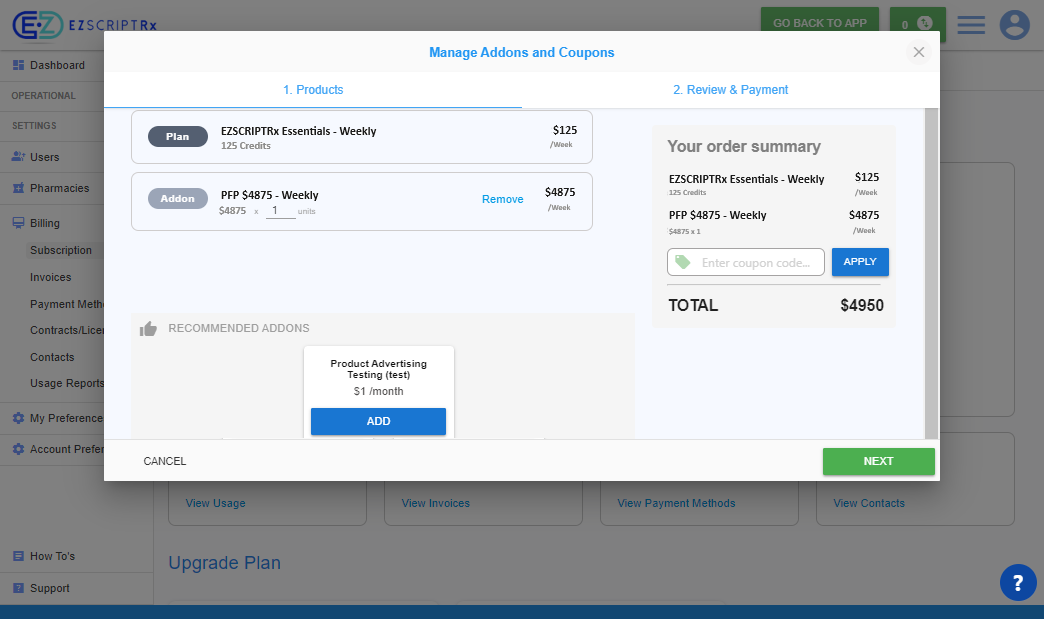
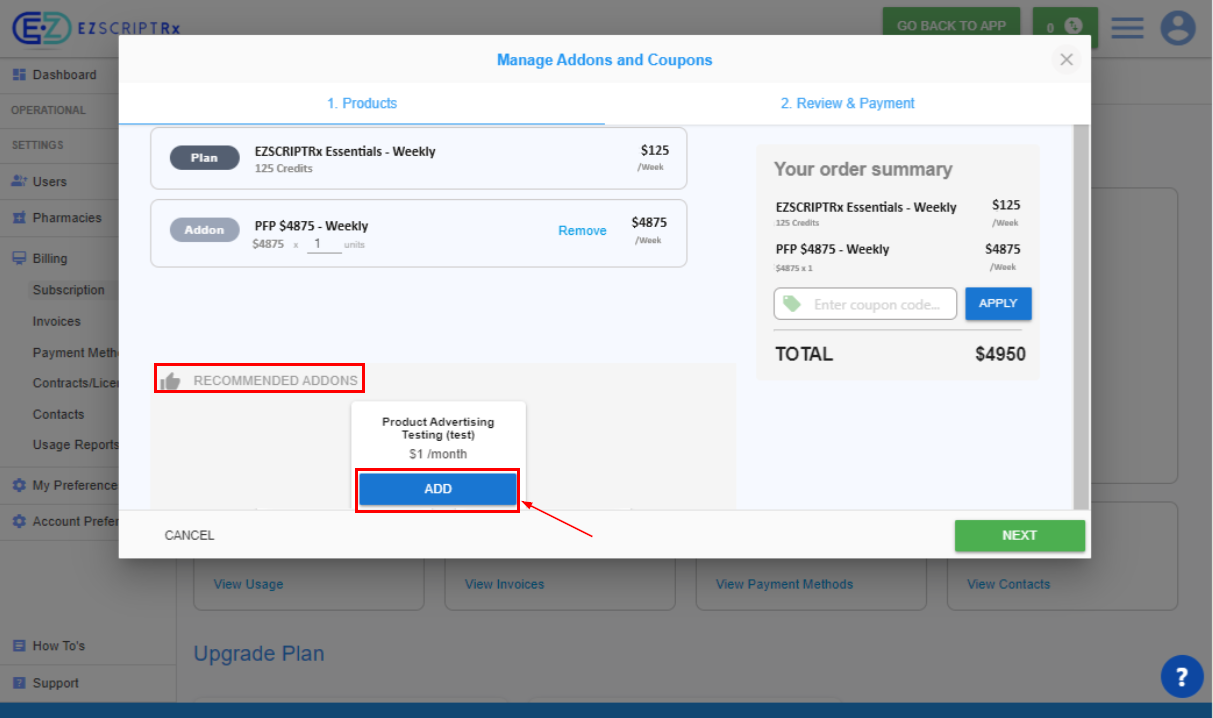
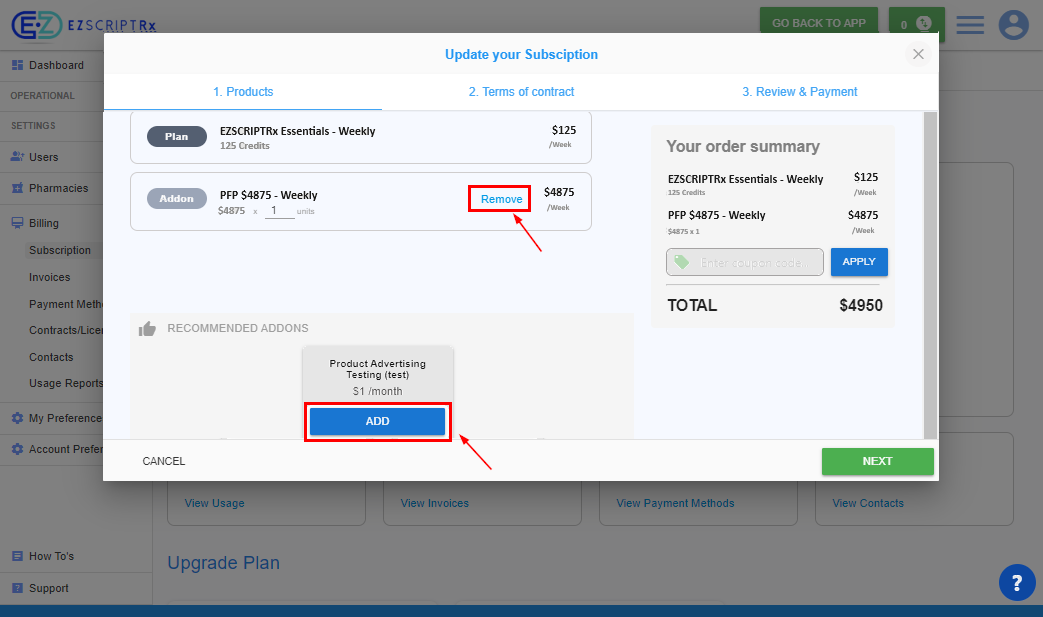
To enhance your current plan, navigate to 'Manage Add-ons and Coupons' where you'll find a list of recommended add-ons. Click 'Add' beside any add-on you wish to include. You can also remove any unwanted add-ons by selecting 'Remove' next to the respective item
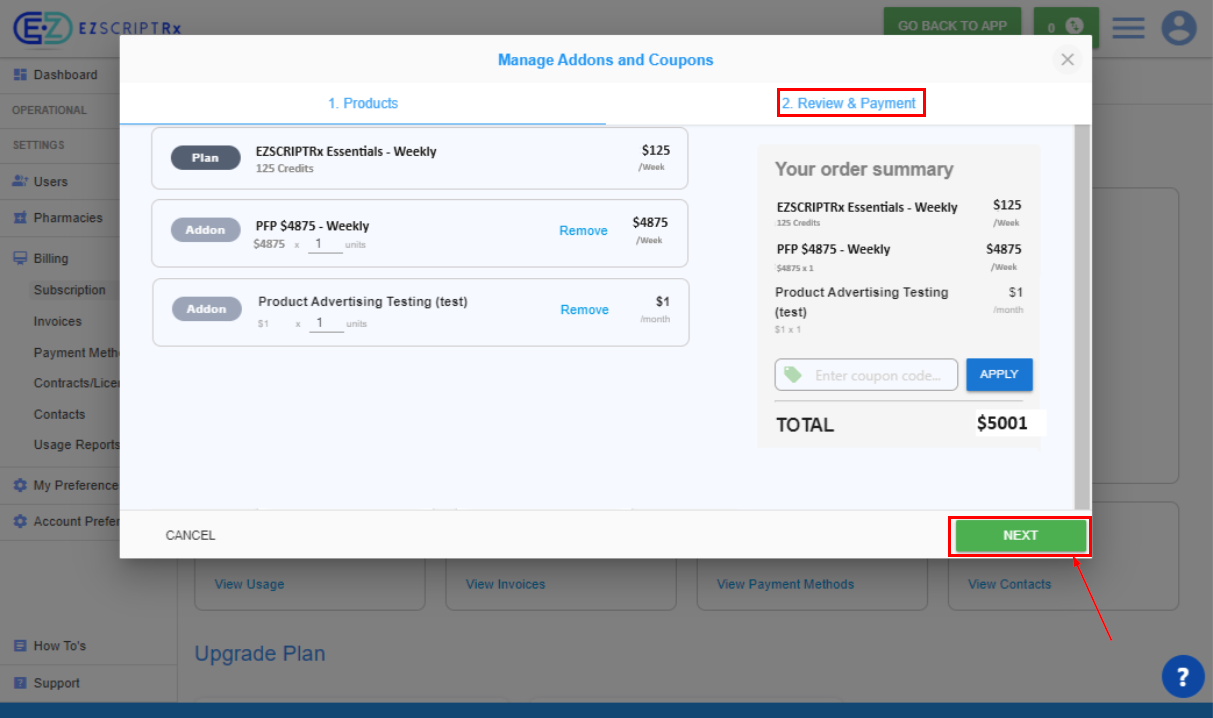
After selecting your add-on, click 'Next' to proceed to the 'Review & Payment' section. Here, you can choose a saved payment method or add a new payment card to complete the transaction.
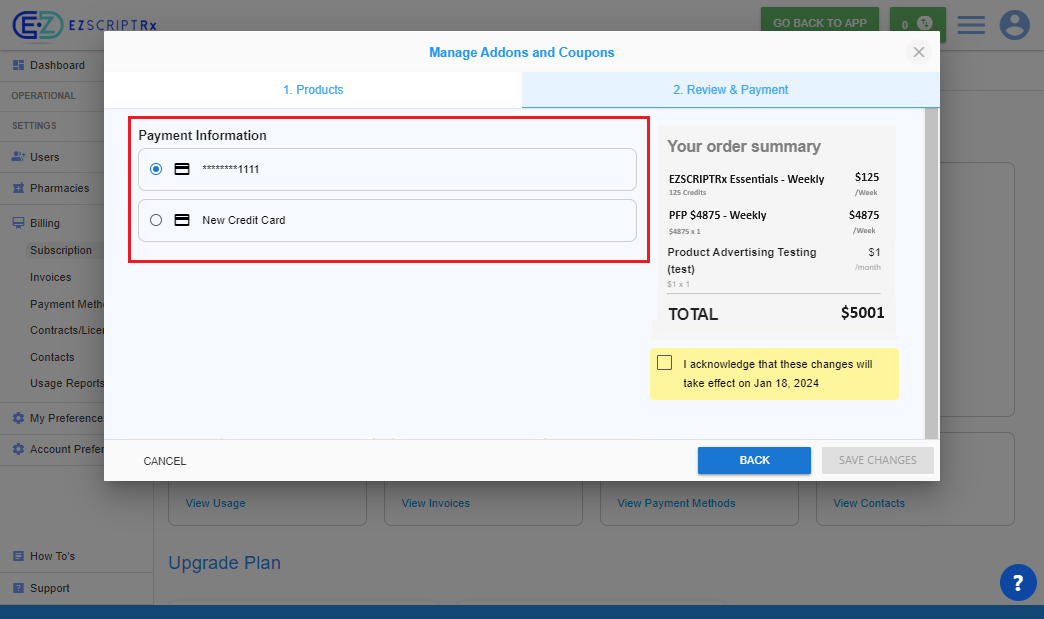
To add a new payment card, choose the 'New Credit Card' option. Complete the form by providing the required information marked with an asterisk (*), which includes card number, expiration date, security code, first name, last name, billing address, city and zip code.
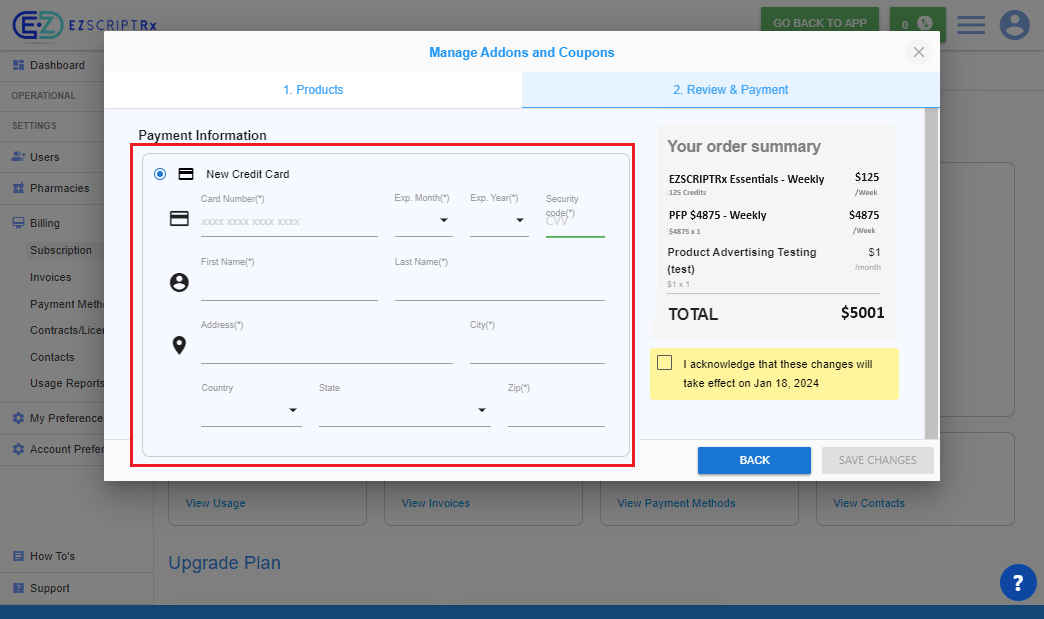
After choosing your payment information, tick the box to acknowledge the changes and then click on 'Save Changes' to finalize your update.
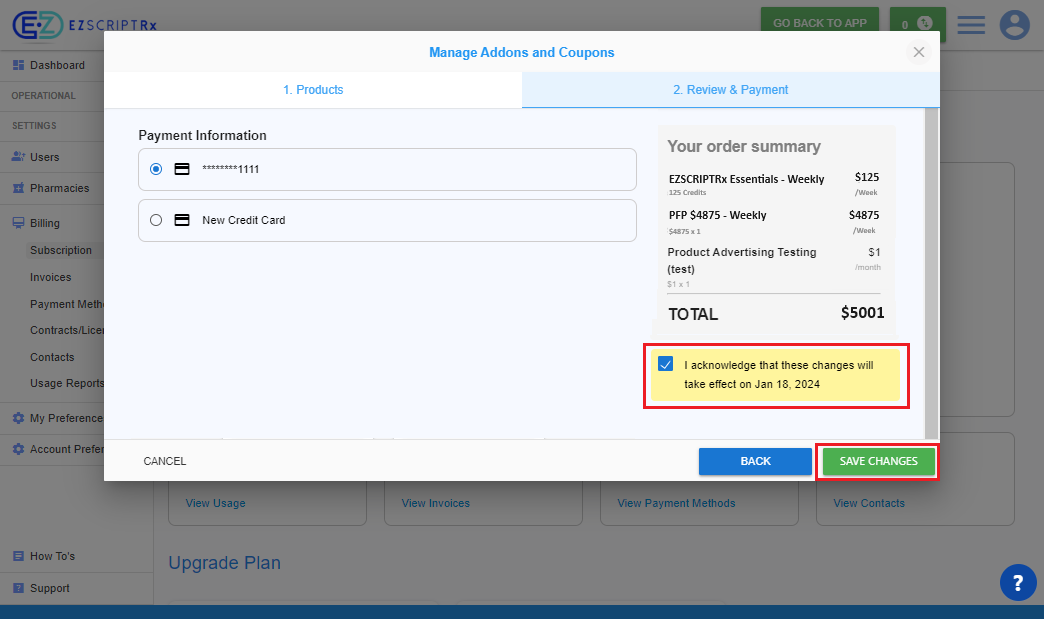
To update your subscription and incorporate add-ons:
In the 'Update your Subscription' interface, recommended add-ons are displayed for inclusion with your new plan. To add an add-on, simply click 'Add' next to the desired feature.
Note: You can also remove current add-ons from your plan by clicking 'Remove' alongside the add-on you wish to discontinue
After adding add-ons, click on “Next”
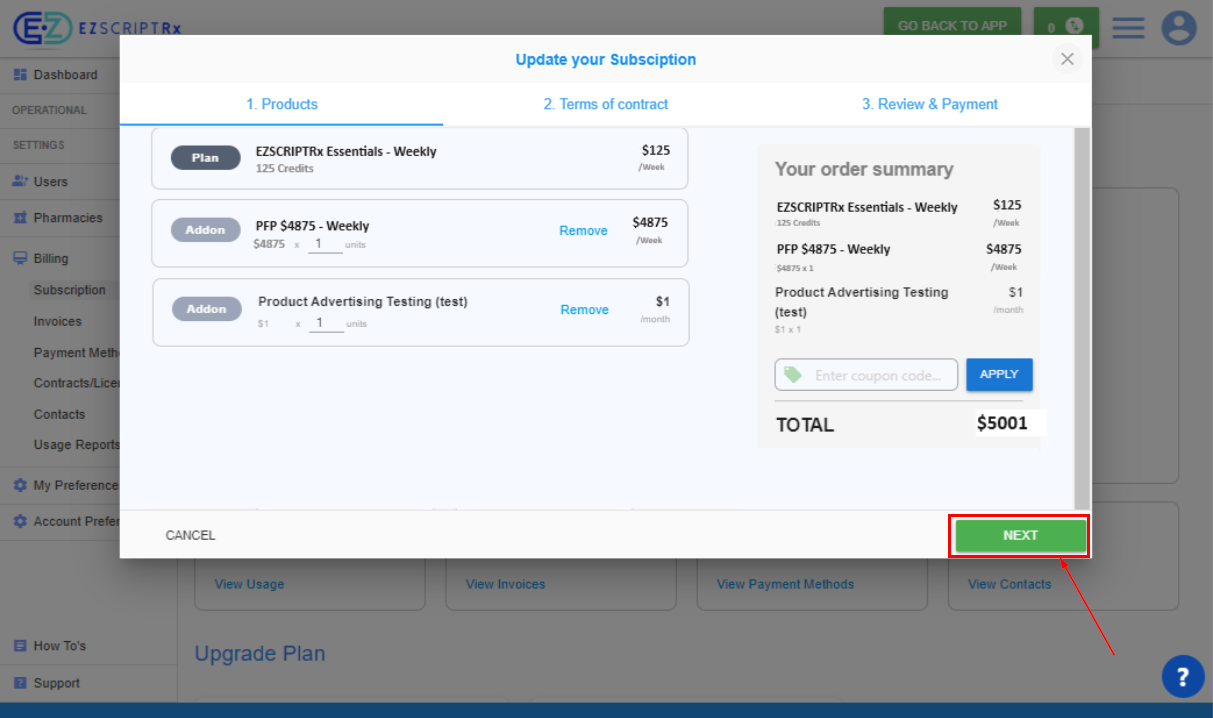
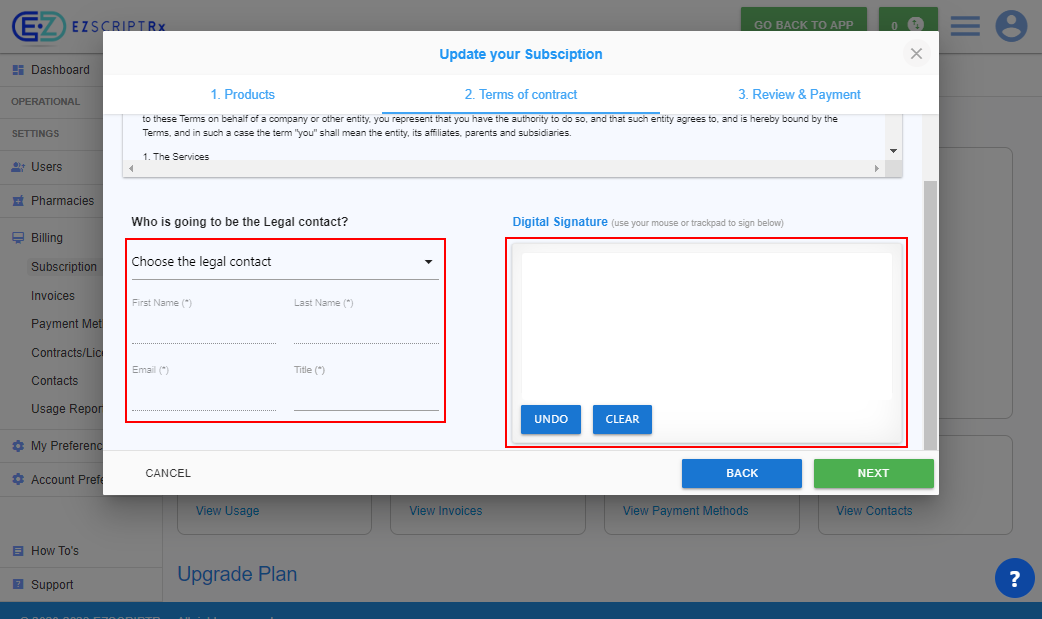
Before entering payment details, it's essential to review the 'Terms of Contract' section. Ensure you read and understand the terms thoroughly. After reviewing, provide a digital signature where indicated to acknowledge and agree to the terms. Once signed, you may proceed to the next step by clicking 'Next'.
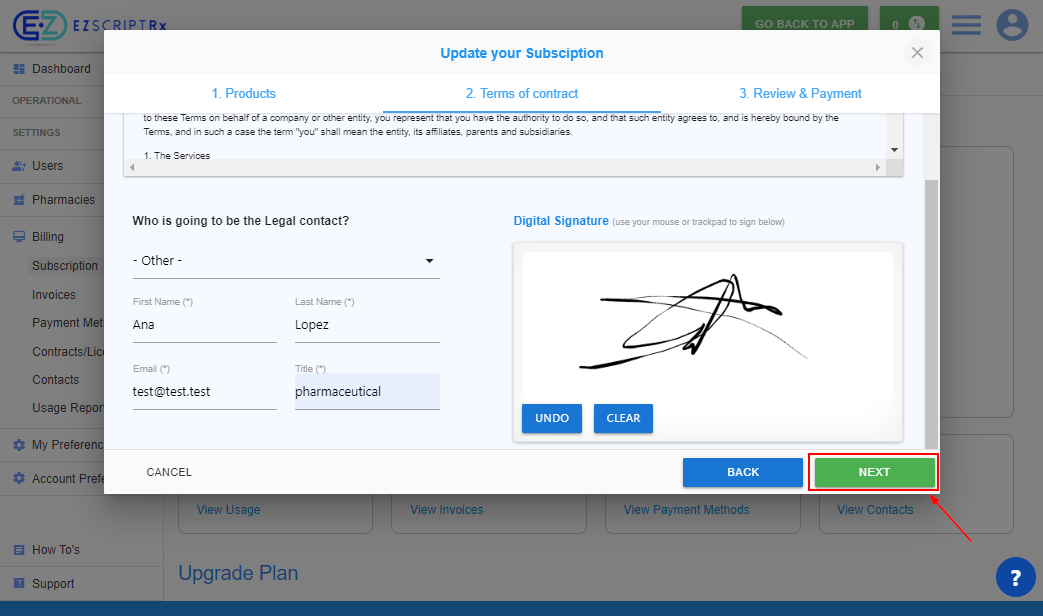
Complete the 'Legal Contact' section by filling out the required fields with the contact's first name, last name, email, and title. Then, sign in the 'Digital Signature' box using your mouse or trackpad to provide your signature. Once done, you can proceed by clicking 'Next'
Click on Next to set payment information
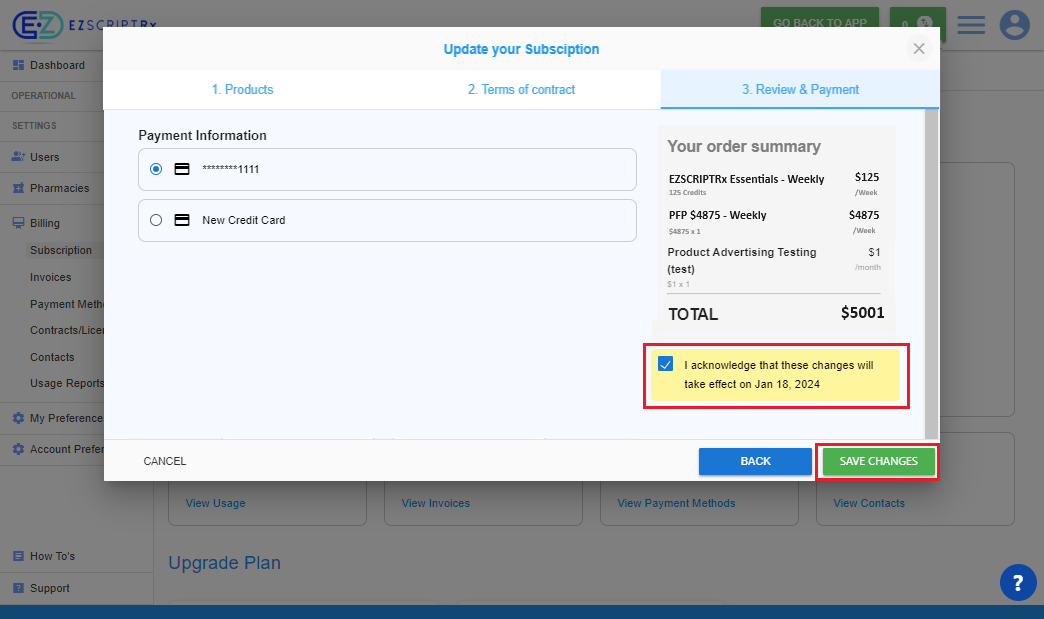
Enter your payment information as detailed previously. Once completed, click on 'Save Changes' to update your subscription details
Upon saving your changes, a notification will appear confirming the scheduled update to your subscription. It will detail when the changes are set to take effect for your plan.
Add a coupon
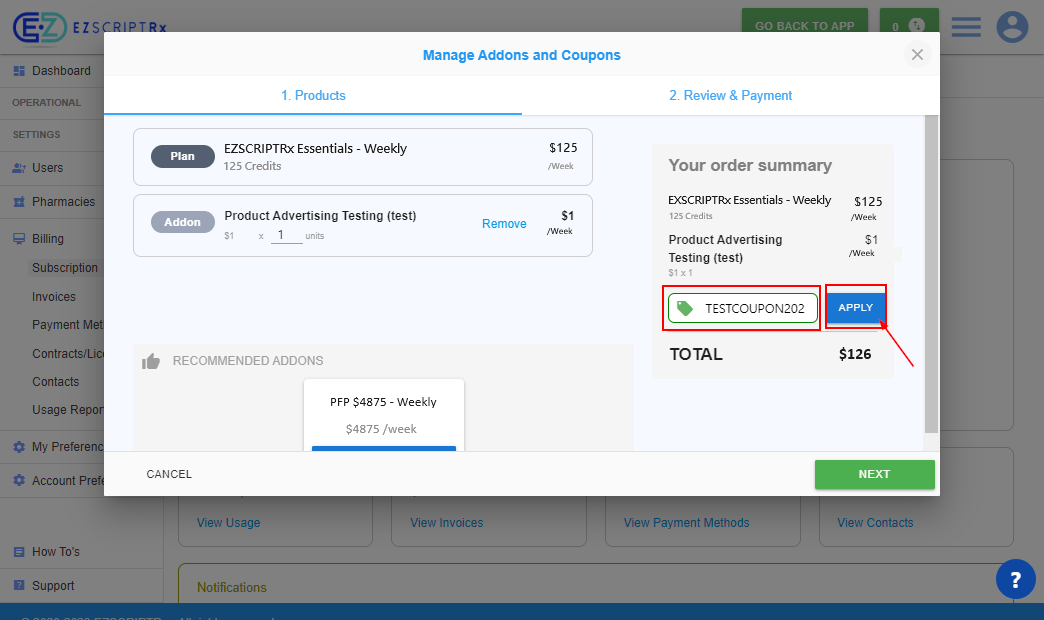
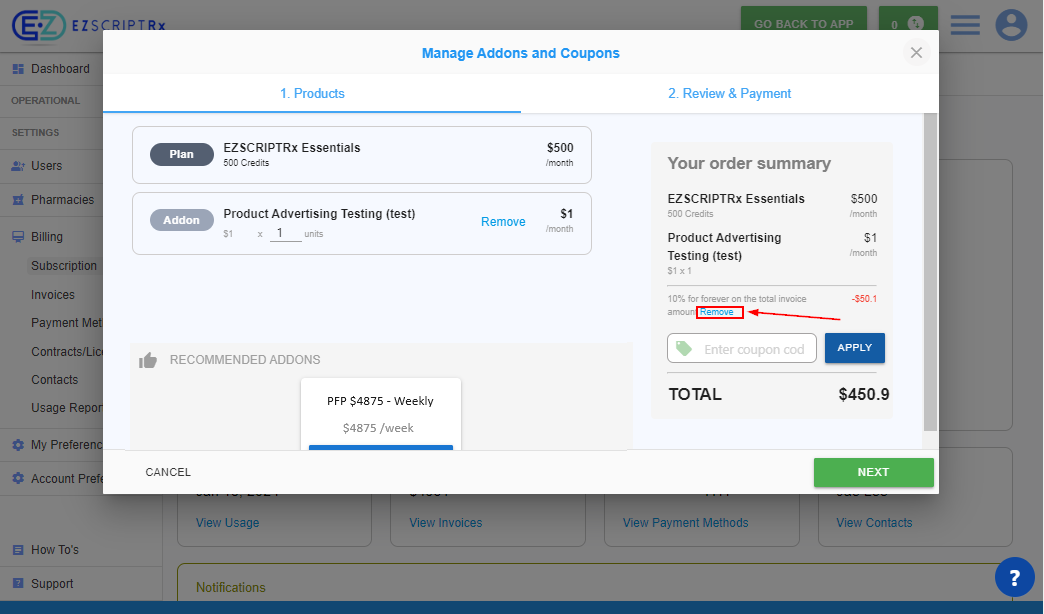
To apply a coupon to your billing, access 'Manage Addons and Coupons' or opt to 'Update your Subscription' if you're altering your plan by selecting 'Choose Plan'. In either section, enter your coupon code into the designated field and click 'Apply' to adjust your total with the promotional offer.
After applying a coupon, its effect will be visible in 'Your order summary.' If you wish to remove the coupon, simply click on 'Remove' next to the coupon's description.
Manage Payment Methods
To manage your payment methods, simply click on 'View Payment Methods' within the Subscription Summary section.
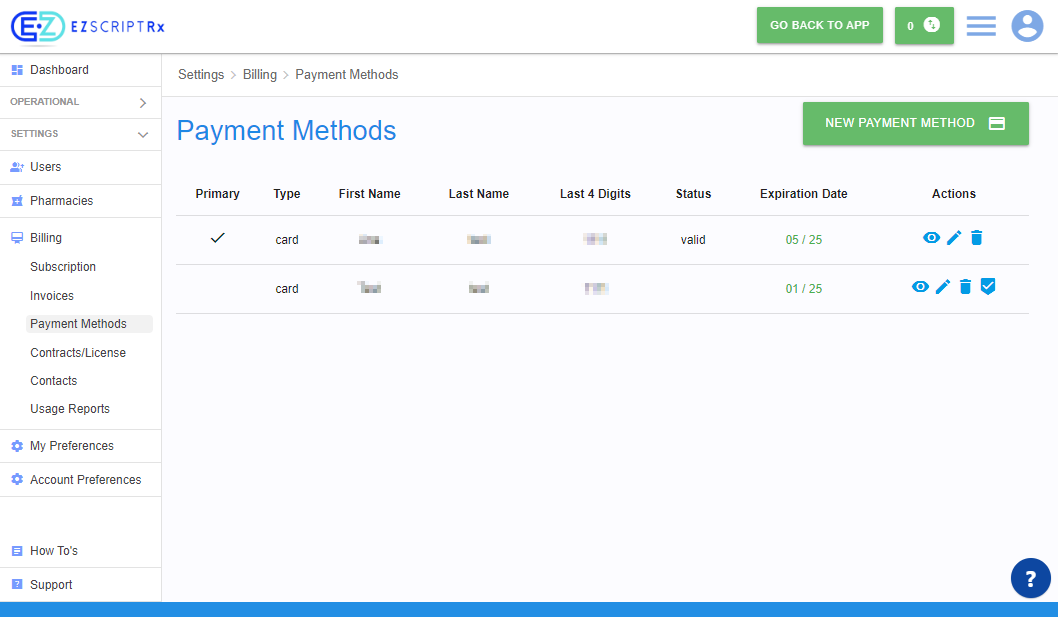
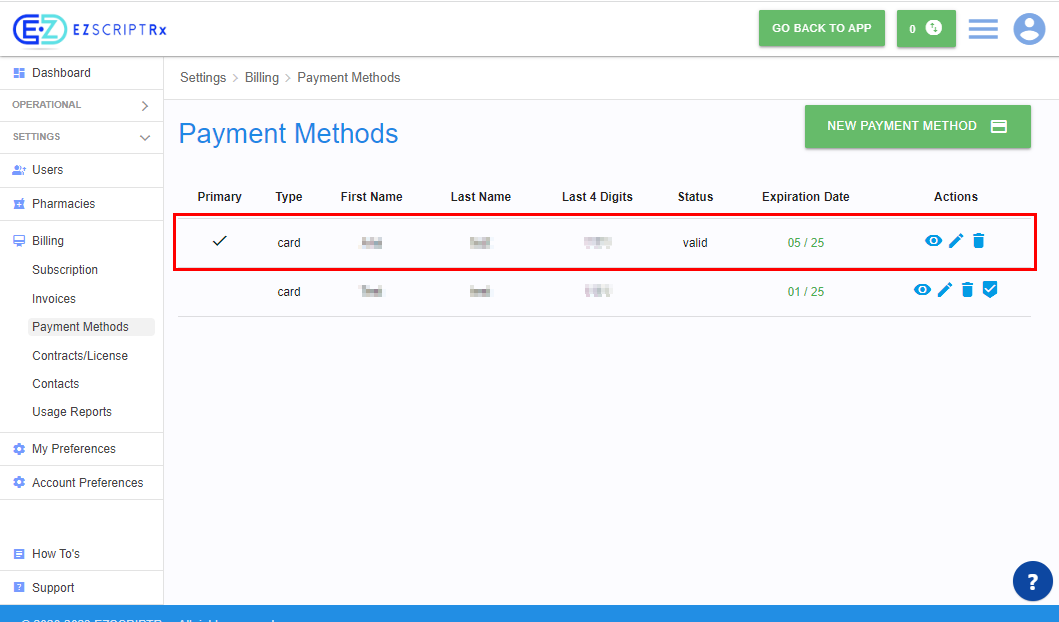
In this section, you have the options to add a new payment method, edit existing details, delete a payment method, or set one as the primary method for transactions.
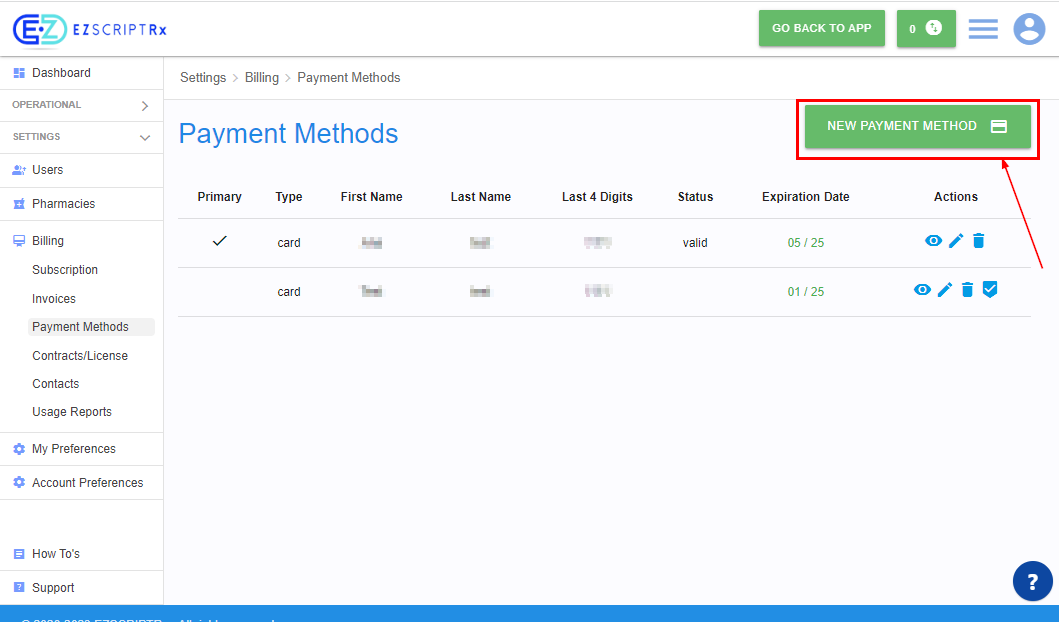
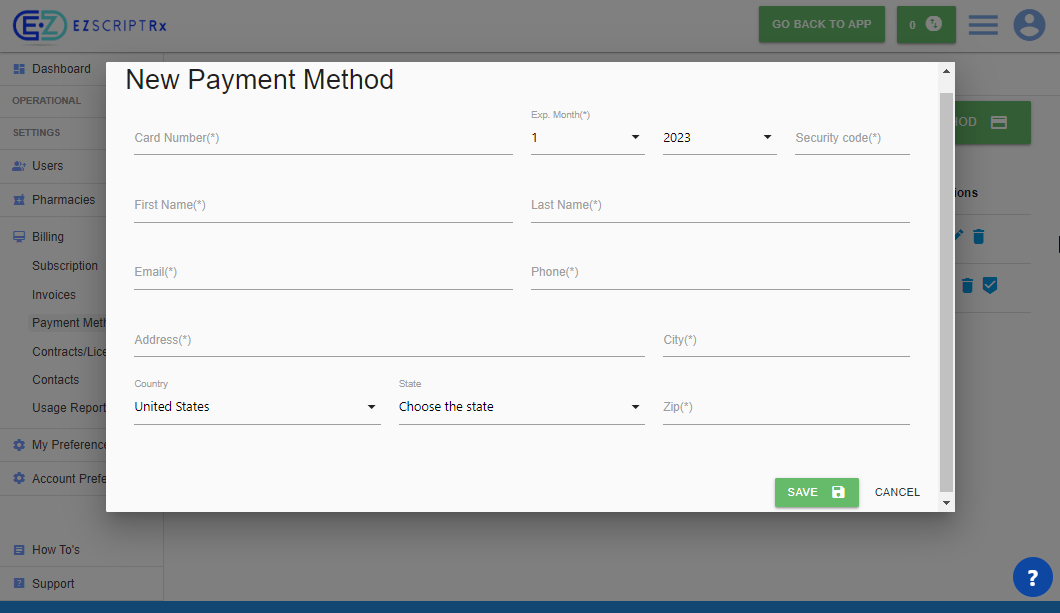
Adding a new payment method
Click on “New payment method”
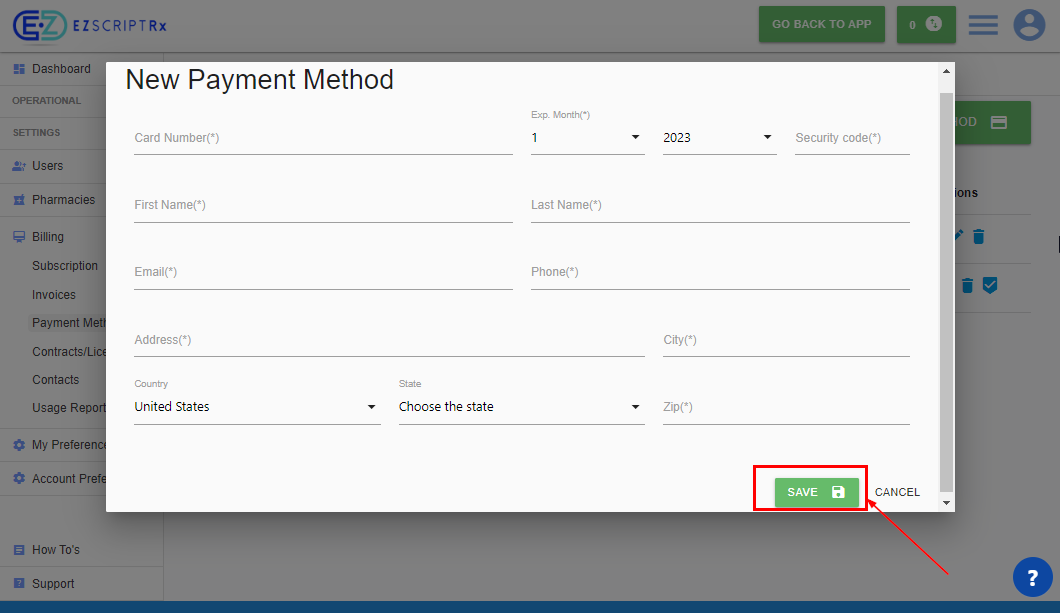
To add a new payment method, fill in the form with the corresponding details, including the card number, expiration date, security code, as well as your first and last name, email, phone number, and billing address. Once completed, click 'Save' to add the new payment method.
After completing the form, click on “Save”
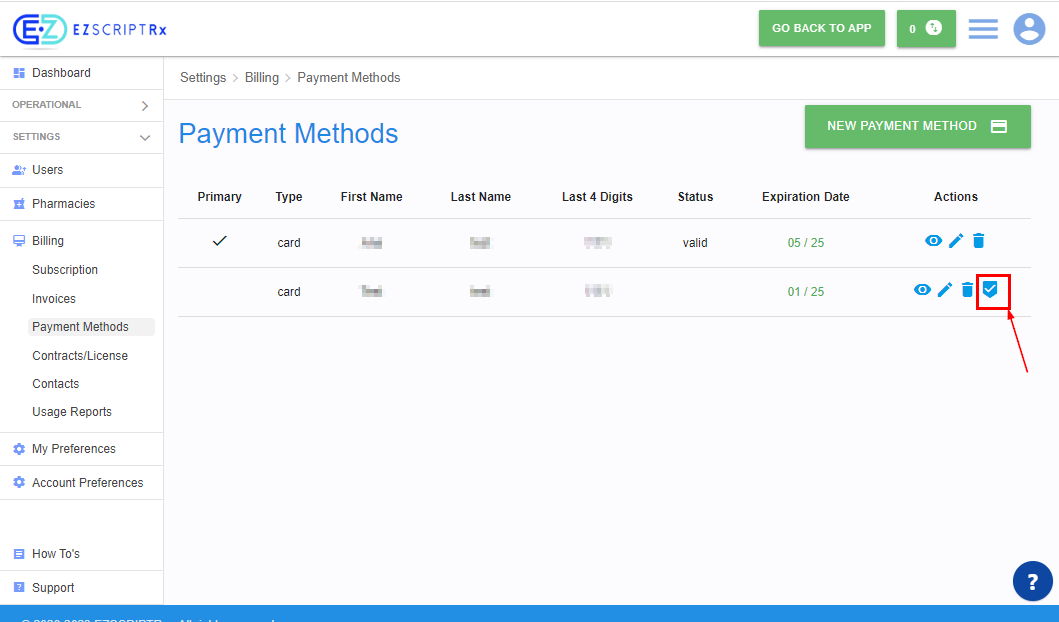
To designate a payment method as primary, click on the icon resembling a checkmark within a circle, located in the 'Actions' column next to the payment method you wish to set as primary.
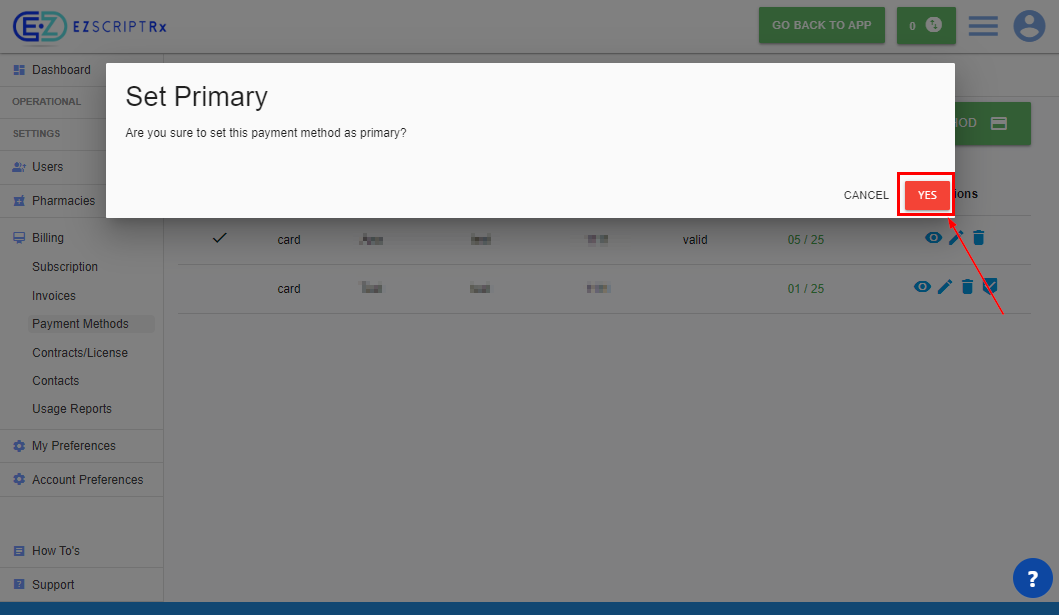
Confirm the change, by clicking on “Yes”
Upon selecting a payment method as primary, it will automatically be positioned first on the list under the 'Primary' column
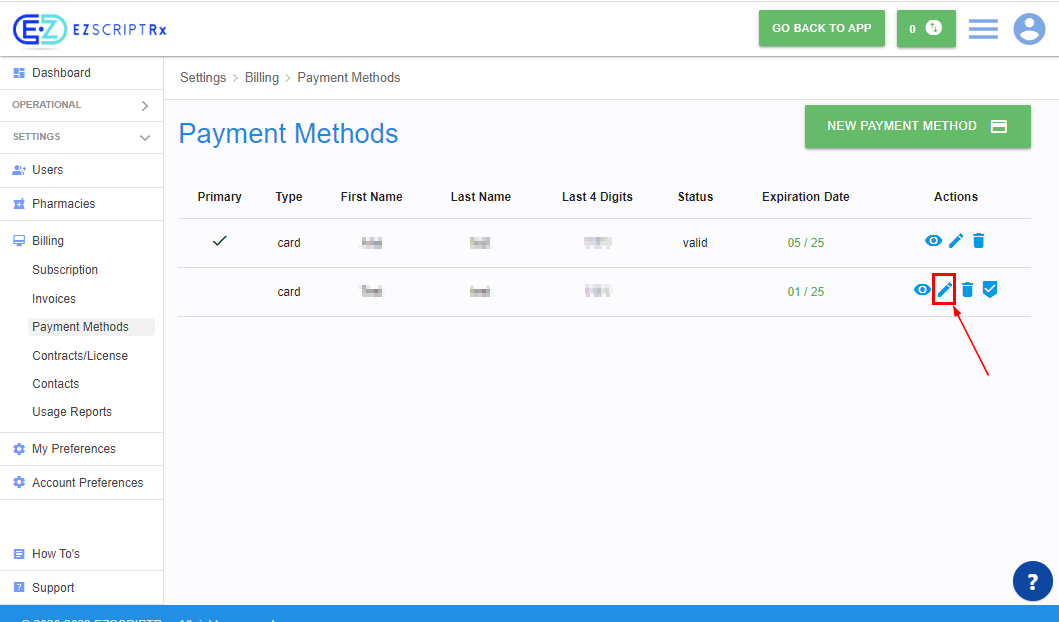
To edit a payment method, click on the following icon
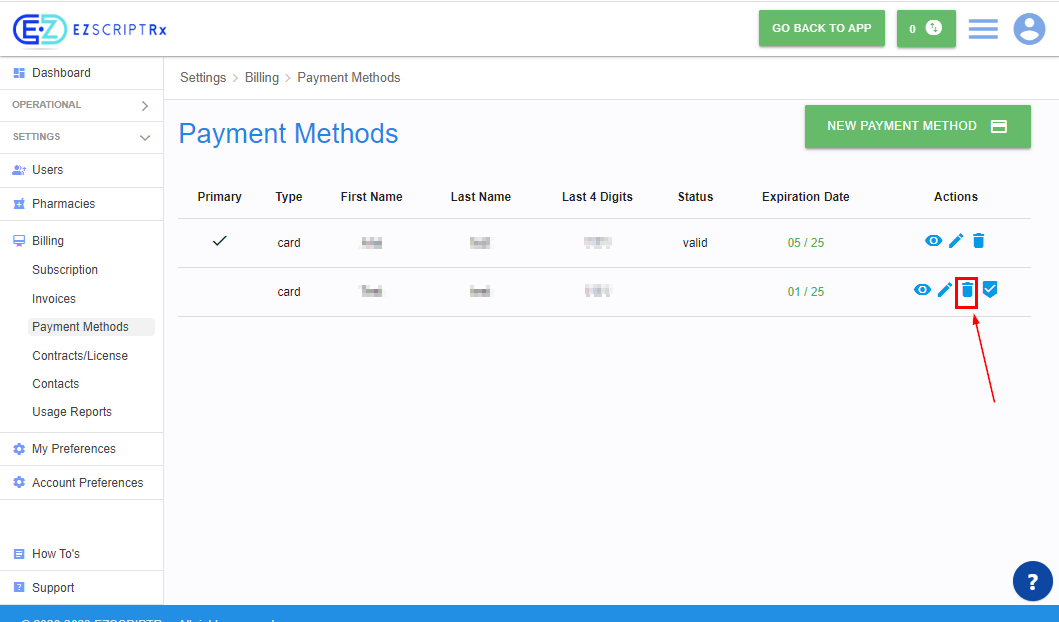
To delete a payment method, click on the following icon
Usage
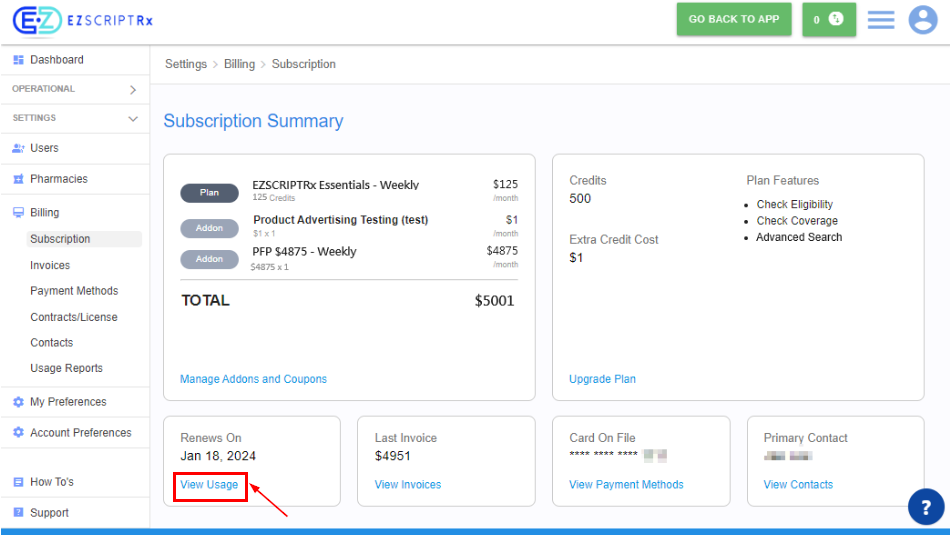
To visualize the Usage of the account, click on “View Usage”
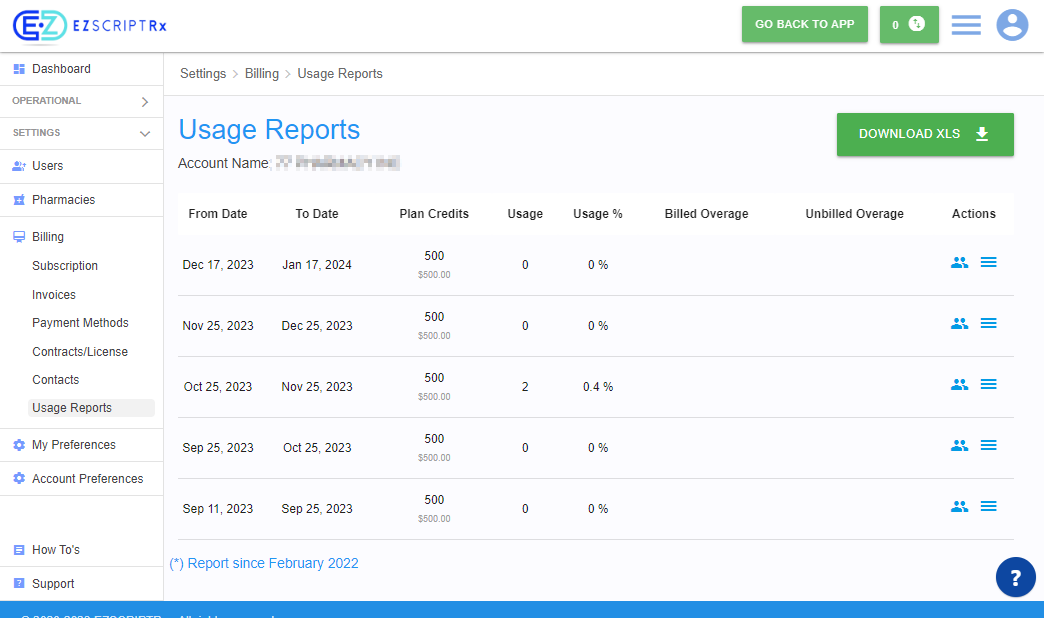
To download a report of the current billing cycle, click on the 'Download XLS' button located in the upper right corner of the 'Usage Reports' section.
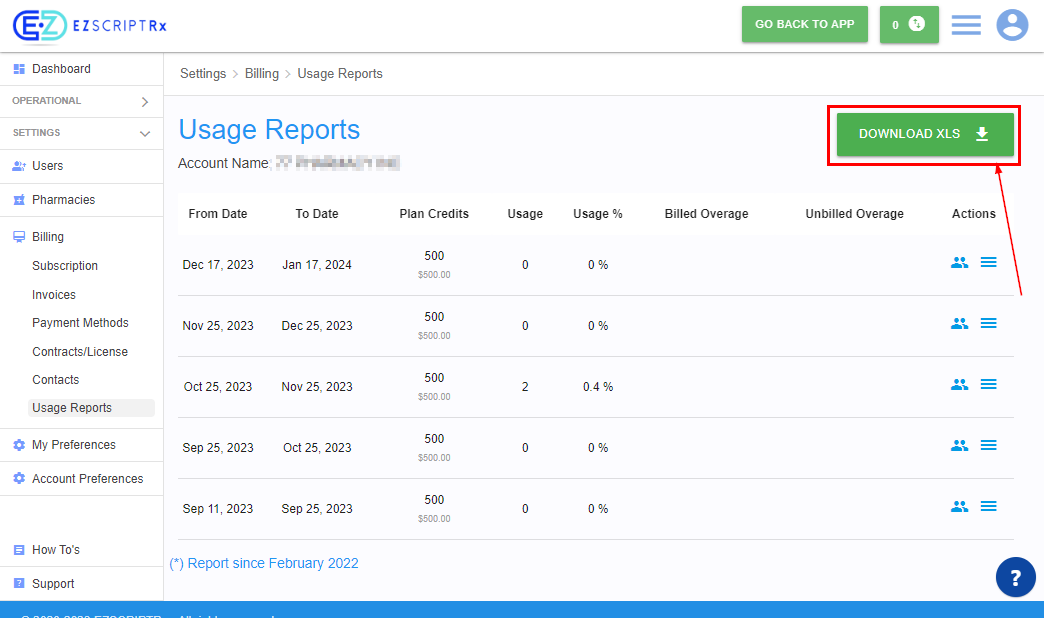
Invoices
To visualize the Invoices of the account, click on “View Invoices”
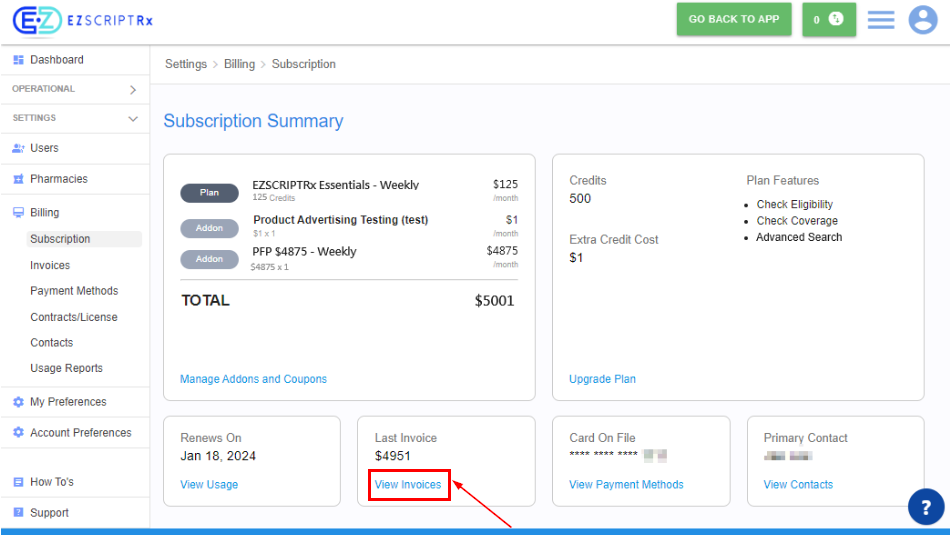
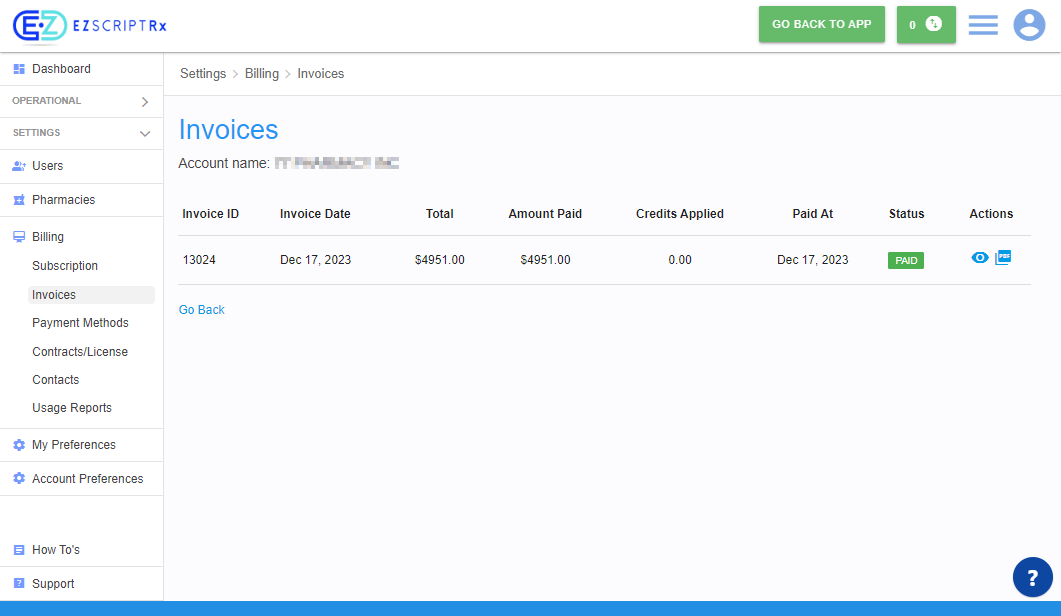
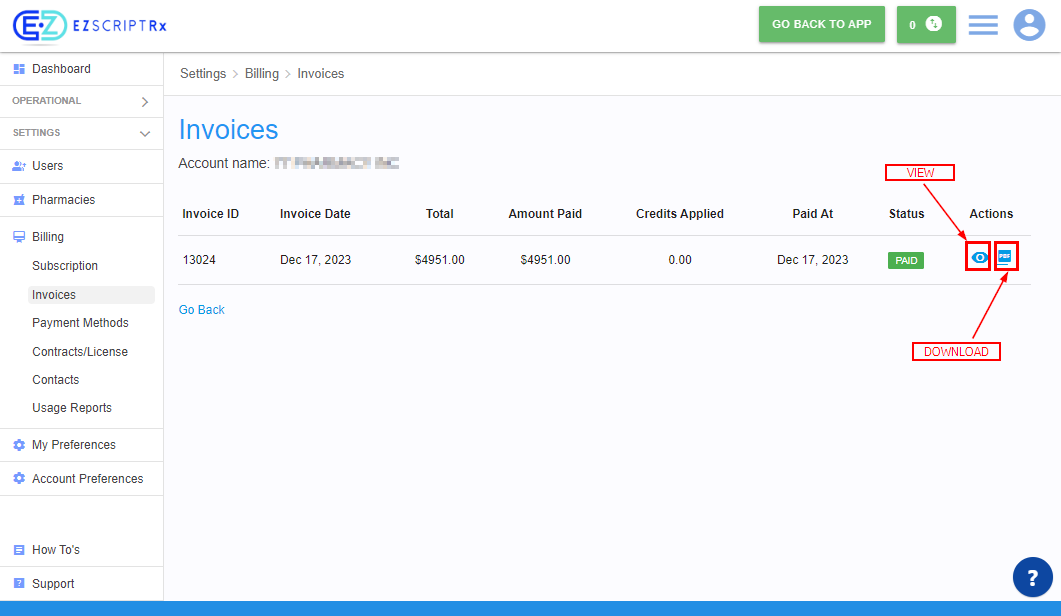
From here an invoice can be viewed or downloaded by clicking on the following icons
Contracts
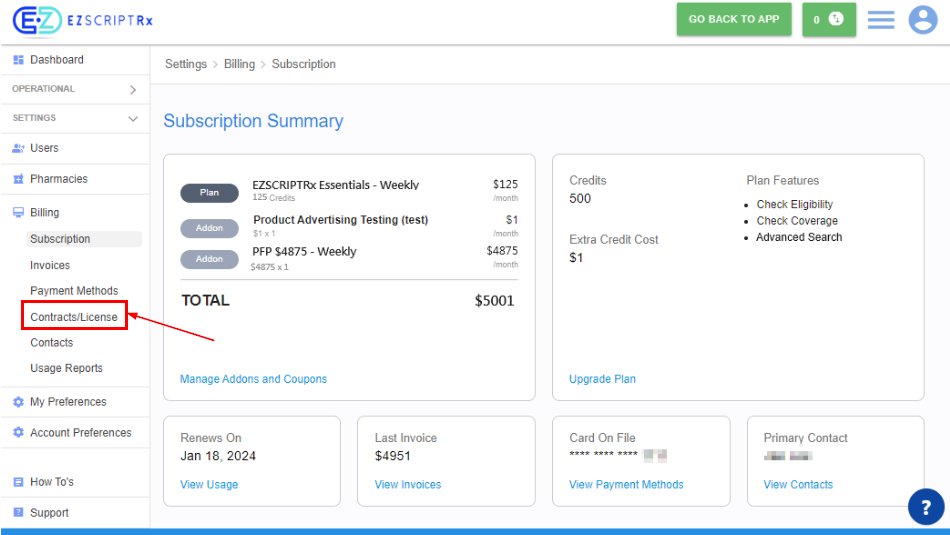
To view the account's contracts, simply click on 'Contracts/License' in the Billing section.
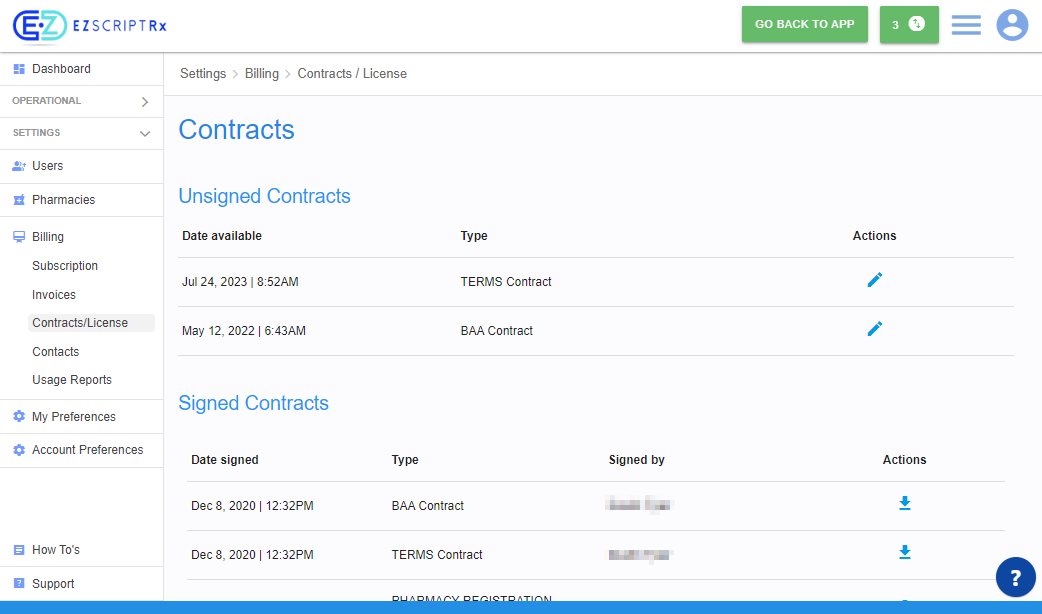
This section displays both signed and unsigned contracts associated with the account.
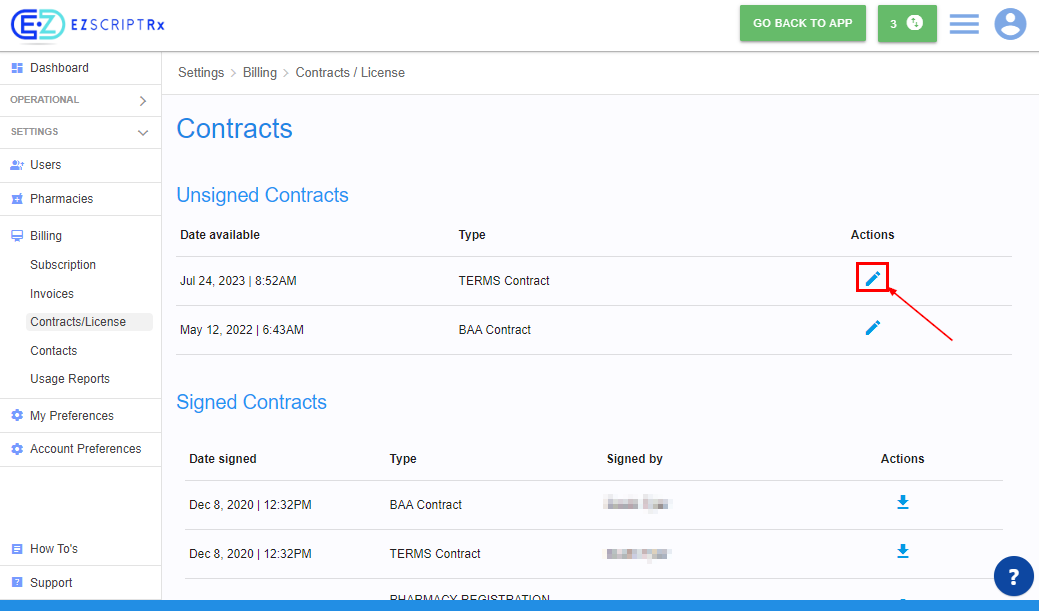
To sign an unsigned contract, click on the pen icon associated with it under the 'Actions' column.
To download a copy of the signed contracts, click on the download icon next to the contract you wish to download under the 'Actions' column.